Success! I got the latest PCBs over the holidays, and finally had a chance to assemble a couple of them. Using the new decoder chip instead of the i2c GPIO expander is way faster. Faster enough that for the first time in this project, I had to worry about putting in a debouncing delay. (Keyswitches like these “stutter” a bit when closing or opening, so if you’re fast enough at scanning them, you’ll get repeated presses.) The loop that scans through the rows/columns has a 1ms delay at the end, so I just added an additional delay any time the key state changed, and adjusted that until things seemed stable (around 10ms). At that point most of the keys were fine, but a few of them sporadically stuttered. I popped the keycaps off and cleaned the switch contacts with sandpaper, and now they’re fine. (One nice feature of the NMB/Hi-Tek “space invaders” keyswitches is that you can do this without disassembling everything.)
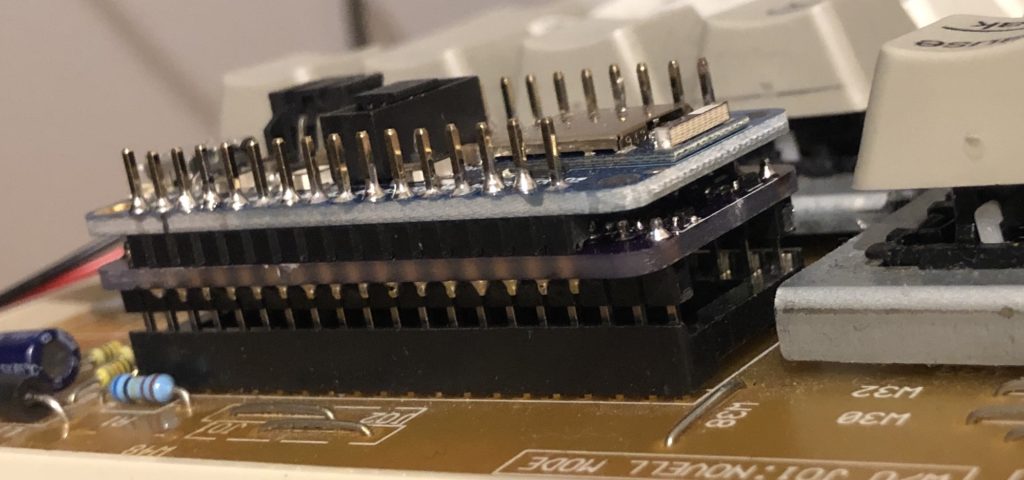
The PCB I made stacks onto the Adafruit Feather microcontroller board, and then attaches to the keyboard PCB. For testing purposes, I have all of these things socketed, but at that point the whole mess sticks up enough that the top of the keyboard frame won’t fit. I haven’t found detachable connectors that were low-profile enough to fit, so for actual deployment I’m soldering everything down pretty much flat. Here’s the Feather and adapter board soldered together, and stuck into a testing socket:

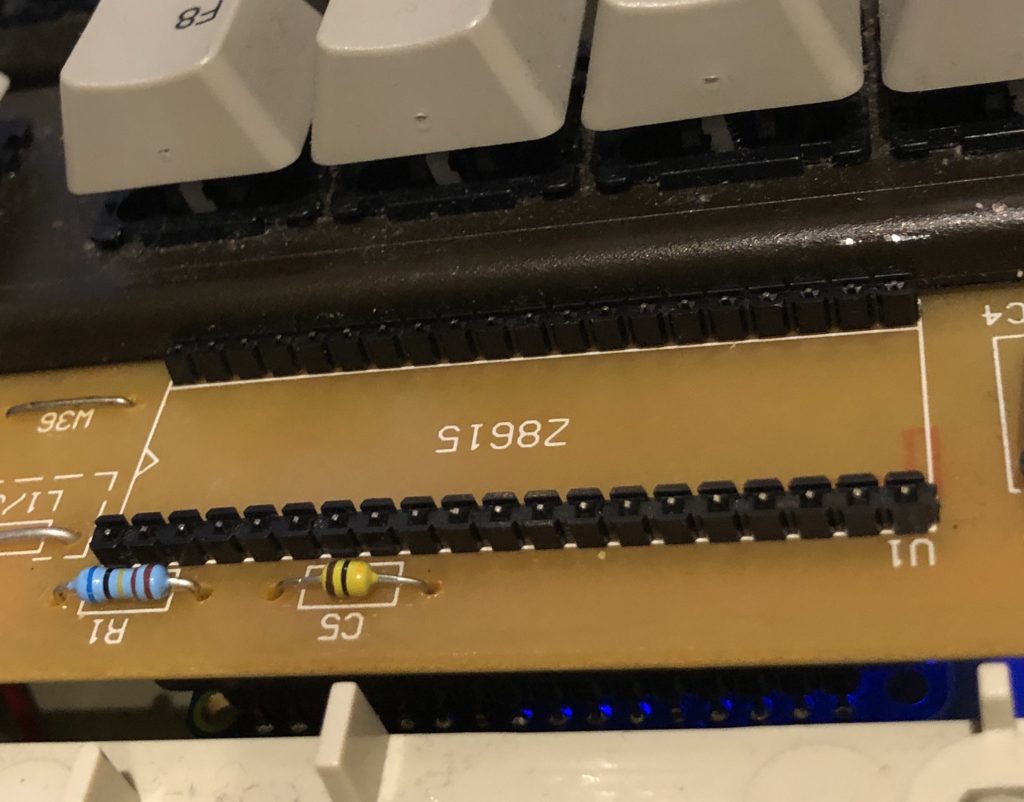
In fact, there are two general models of keyboard that I’m working with; that one is the more compact layout (the RT8756C+ and similar). It predates the existence of the Windows modifier keys. The other models are the RT8255C+ and RT8255CW+, the latter of which is the only one of these keyboards I’m aware of that includes the Windows key. These models have a larger, flatter case, and they have no space on top for the adapter. They do have a bit of space underneath, though. On the wrong side of the PCB. So, for those it’s a bit of a hack. Here’s the top side:

In place of the original 40-pin microcontroller, there’s just some header pins, pushed all the way down so they stick on the other side enough that I can solder them in place and then still stick a connector onto them, like so:

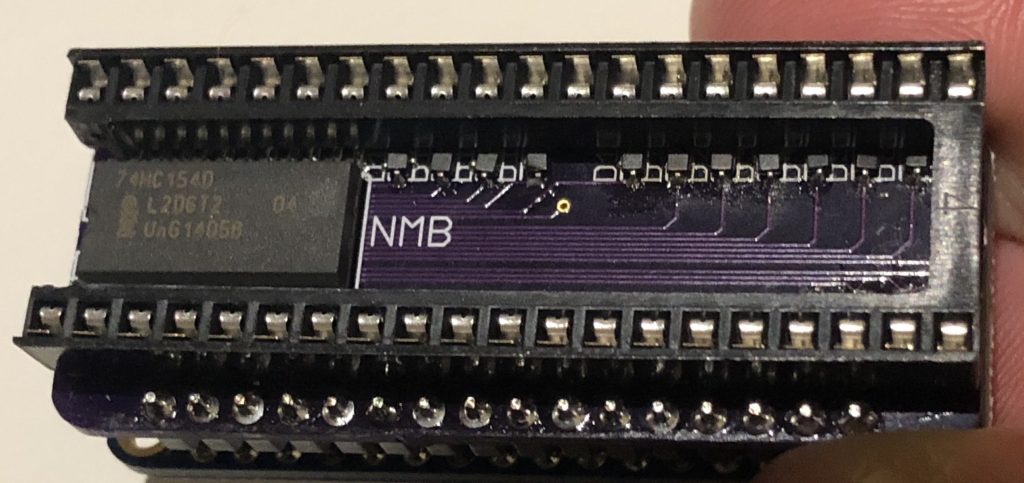
That’s the same Feather/adapter combo as before, but assembled upside-down, with a 40-pin socket soldered to the adapter so it can connect with the pins hanging down from the keyboard PCB:


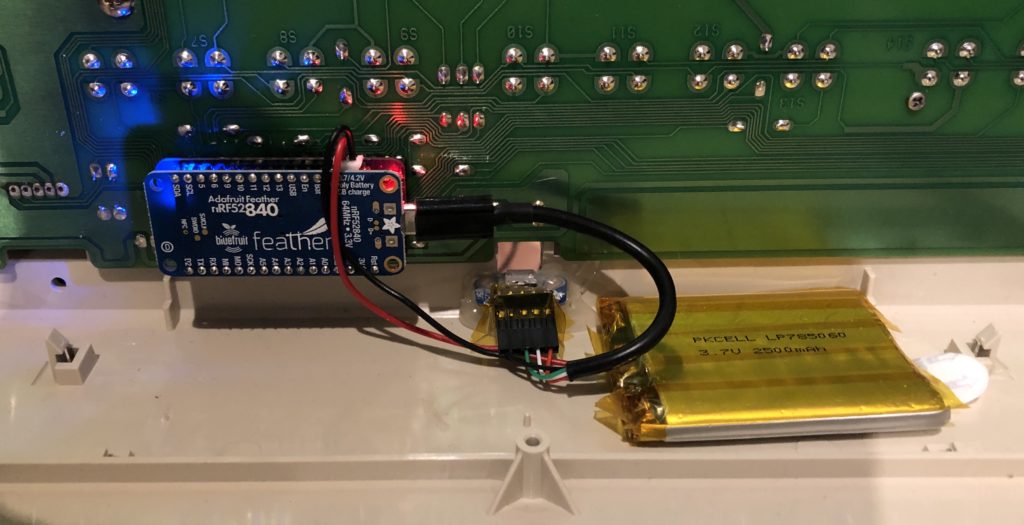
I had to trim the socket to fit around the decoder chip, but it all fits, and works. Here’s what it looks like installed:

It’s a pretty minimal installation; just the adapter/Feather combo, a Li-Poly battery, and a microUSB extension leading to the outside, so it can be plugged in for charging and reprogramming.
Now that the keyboard is functional, I’ve been able to start going through the rest of the to-do list for features. First up was making the capslock light work. I could make the NumLock and Scroll Lock lights work, but nothing really uses them. One of the to-do items is to repurpose the Scroll Lock light as a battery indicator (flash slowly at 50%, quickly at 10%). I need to put in some ability to have a hotkey for “Consumer Control” keys like volume up/down and playback control. I don’t know how long this battery lasts with the current arrangement, but I may want to put in some sort of sleep mode. Unfortunately, one drawback of the current arrangement with the decoder chip is that there’s no way to select all columns at once so I can have the microcontroller go into sleep mode until any key at all gets hit and generates an interrupt. I may be able to rework the design to add in transistor logic to accomplish that, but it would undoubtedly be more complex. Worst-case, I can designate a special “wake key” that is the only one that would wake up the keyboard and just monitor that one.
I also need to come up with a good solution for filtering out ghosted keys; since keyboards like this work by connecting rows and columns of connections, if you press some arrangements of keys, they’ll short out and make it look like an additional key is pressed. If you press the keys in position A1 and A4, and then press the key in the C1 position, it will also appear that you pressed the C4 key; column C and row 4 are connected because C and 1 are connected, and 1 and 4 are both connected together through A. Newer keyboards that support effectively unlimited simultaneous keypresses (NKRO, or N-key rollover) work by having a diode inline with each keyswitch, preventing it from shorting out backwards like that. These keyboards don’t have any of that. My plan for this so far is to take advantage of the fact that when a ghosted key appears, it should always be two new keys being detected in the same scanning pass, which is unlikely to happen otherwise. So if it sees two new keys being pressed, it should just ignore them until the next key state change occurs.
Anyway, unless I think of a clever arrangement for supporting interrupt-driven wakeup, the hardware side might be done.
