
All of the pieces were printed using plain white PETG filament, so everything came out looking this this:
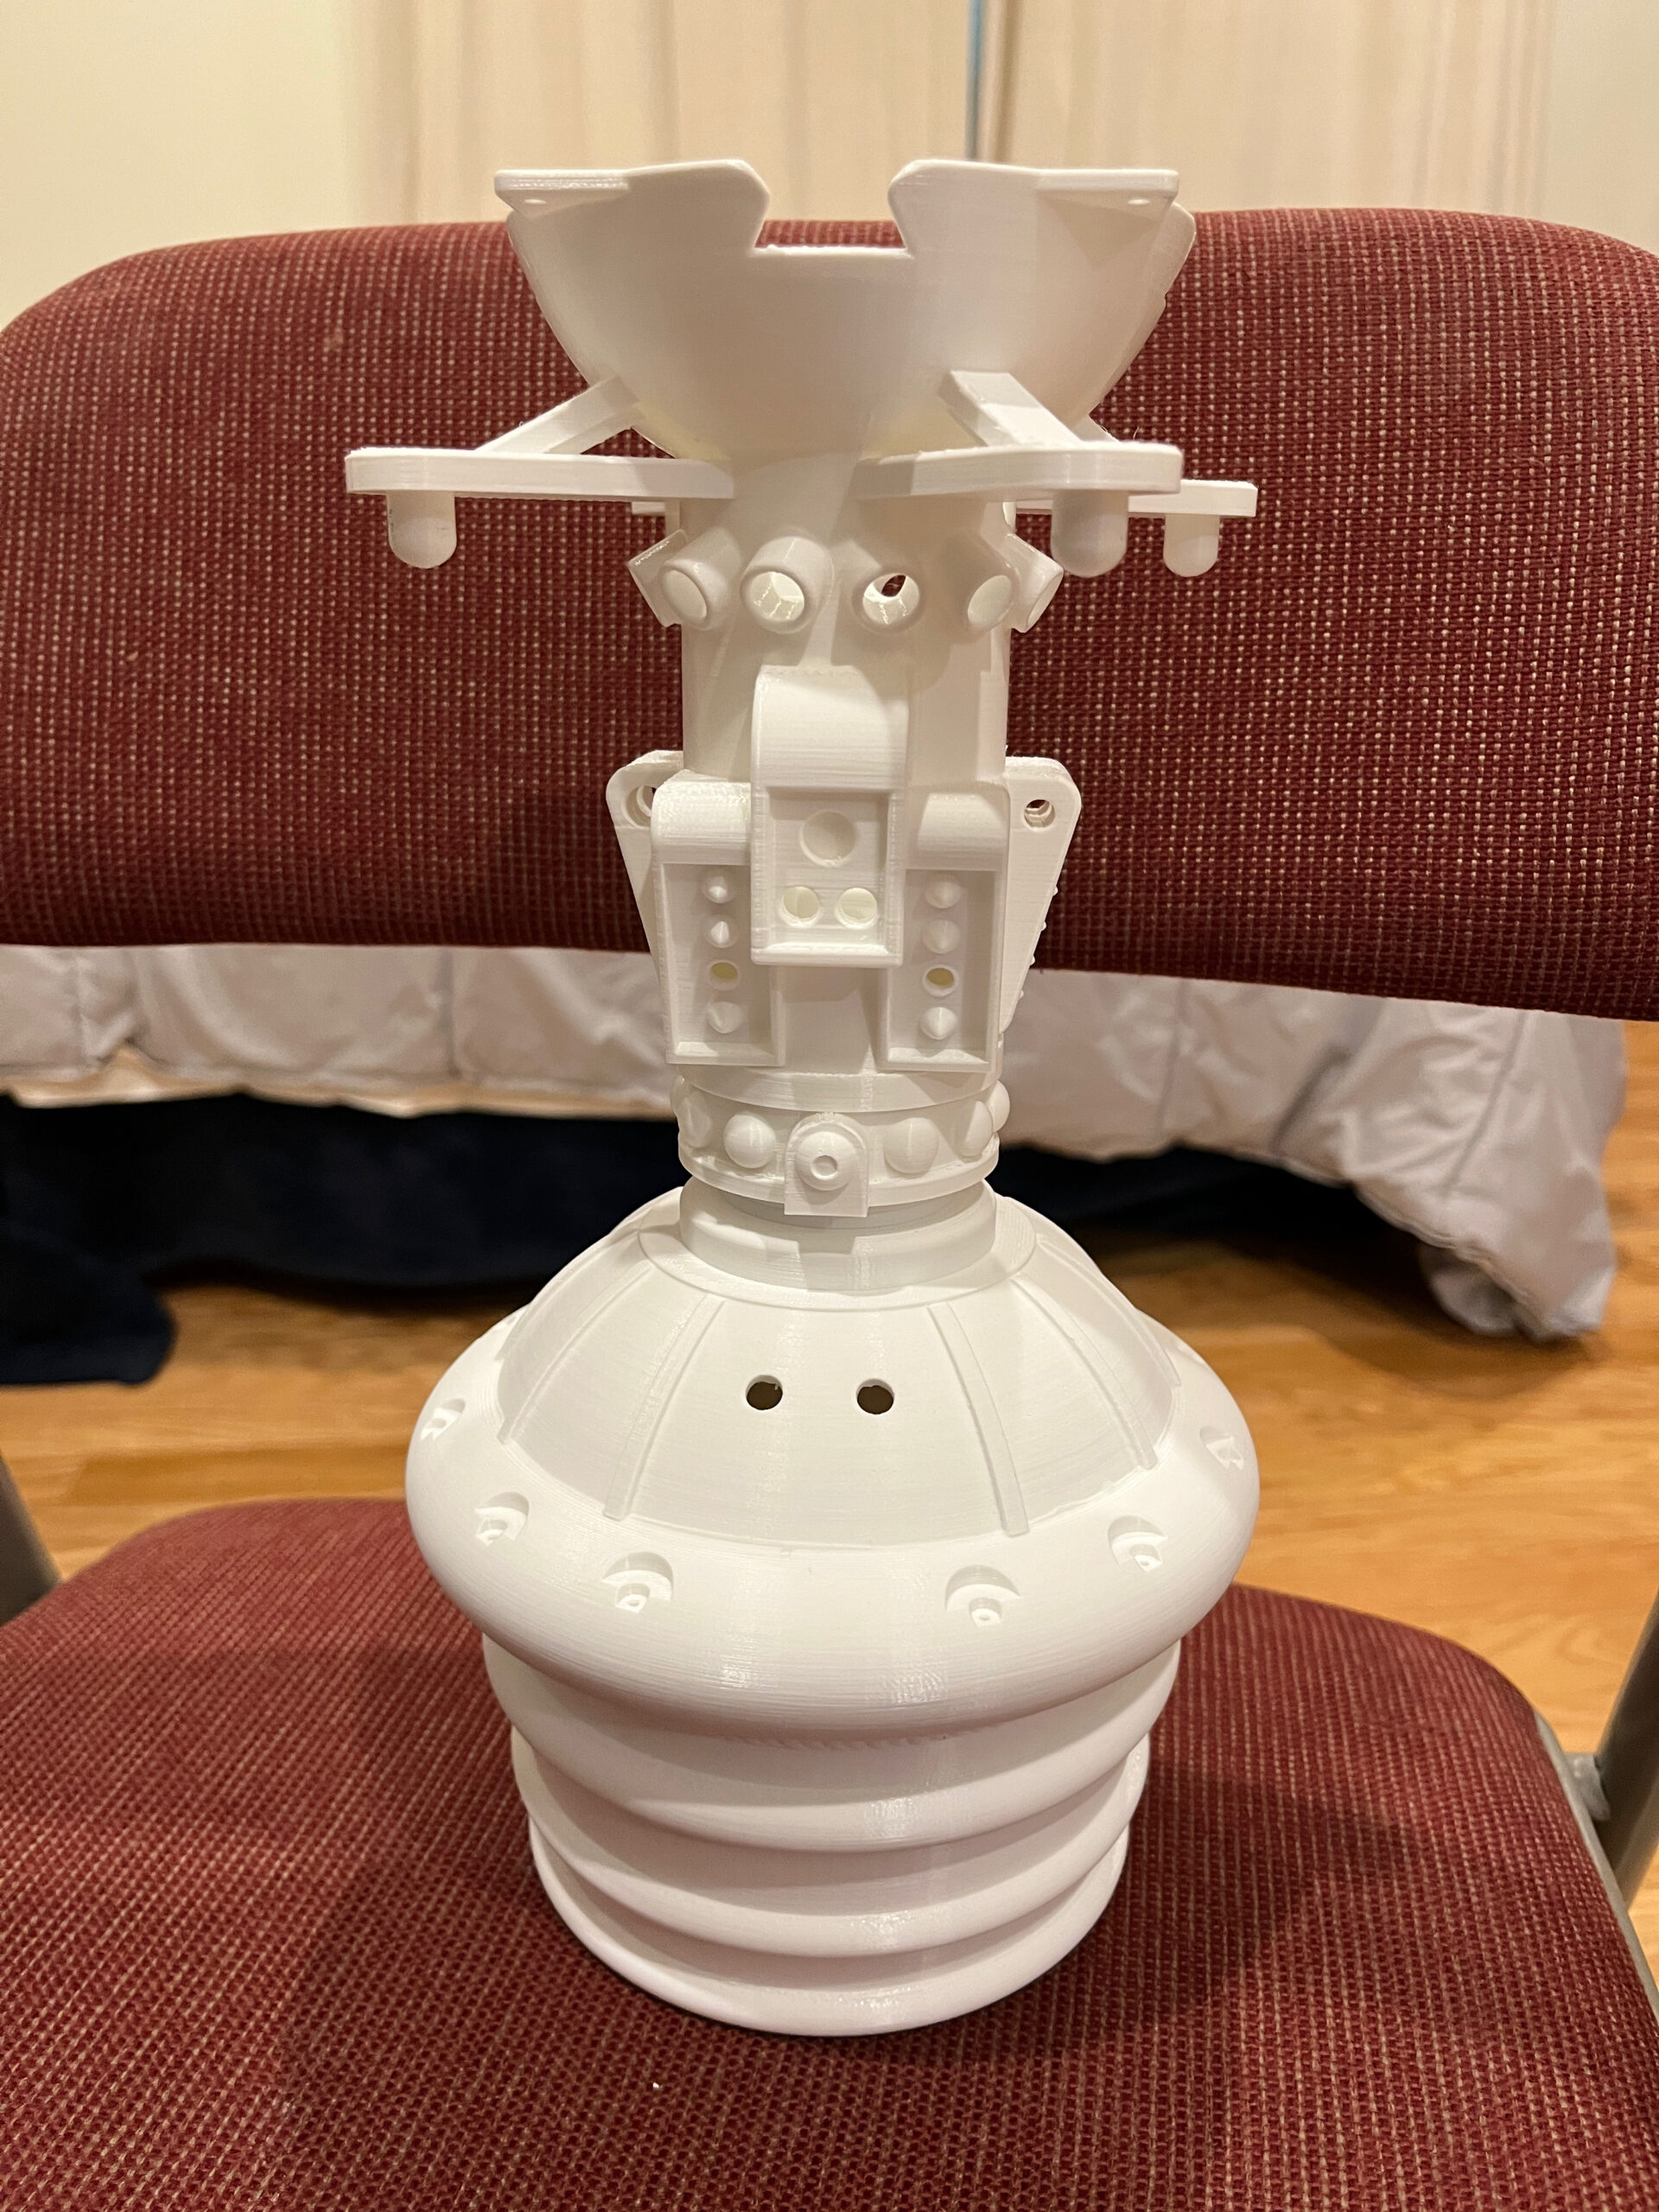
Painting anything like this was a new experience for me, so I learned a number of lessons along the way. I don’t have an airbrush, so I was going to be using regular spray paint cans, which can give a good metallic-looking finish if the surface is sufficiently prepared for them. Spraying chrome paint on the parts straight out of the printer would look awful, because the surface needs to be smooth. The shiny reflective paint will highlight every non-smooth detail on the surface, and every one of those will make it look less like metal. That means the visible layer lines from the 3D printing process have to be smoothed out, and so does any other disruption in the surface.
I went through some trial and error through the project, but in general I worked over the parts with a low-grit sandpaper (always wet sanding, to avoid making a cloud of plastic particulates), then put on a layer of sandable filler primer to help fill in the gaps, then (wet) sanded that with a medium-grit sandpaper, then repeated those two steps if it seemed necessary. Once I got things looking about as smooth as the primer would get, then I’d put down a layer of glossy black paint, and then go over that with a high-grit sandpaper. Then I’d bring out the chrome spray paint, doing lots of quick passes from slightly further away than the rest of the paint. Before any spray-painting pass, I’d wipe the surface down with a microfiber cloth, then with a tack cloth to make sure the paint wouldn’t hit some errant bit of dust or lint.
Once I got this process down, the pieces started looking incredibly metallic:
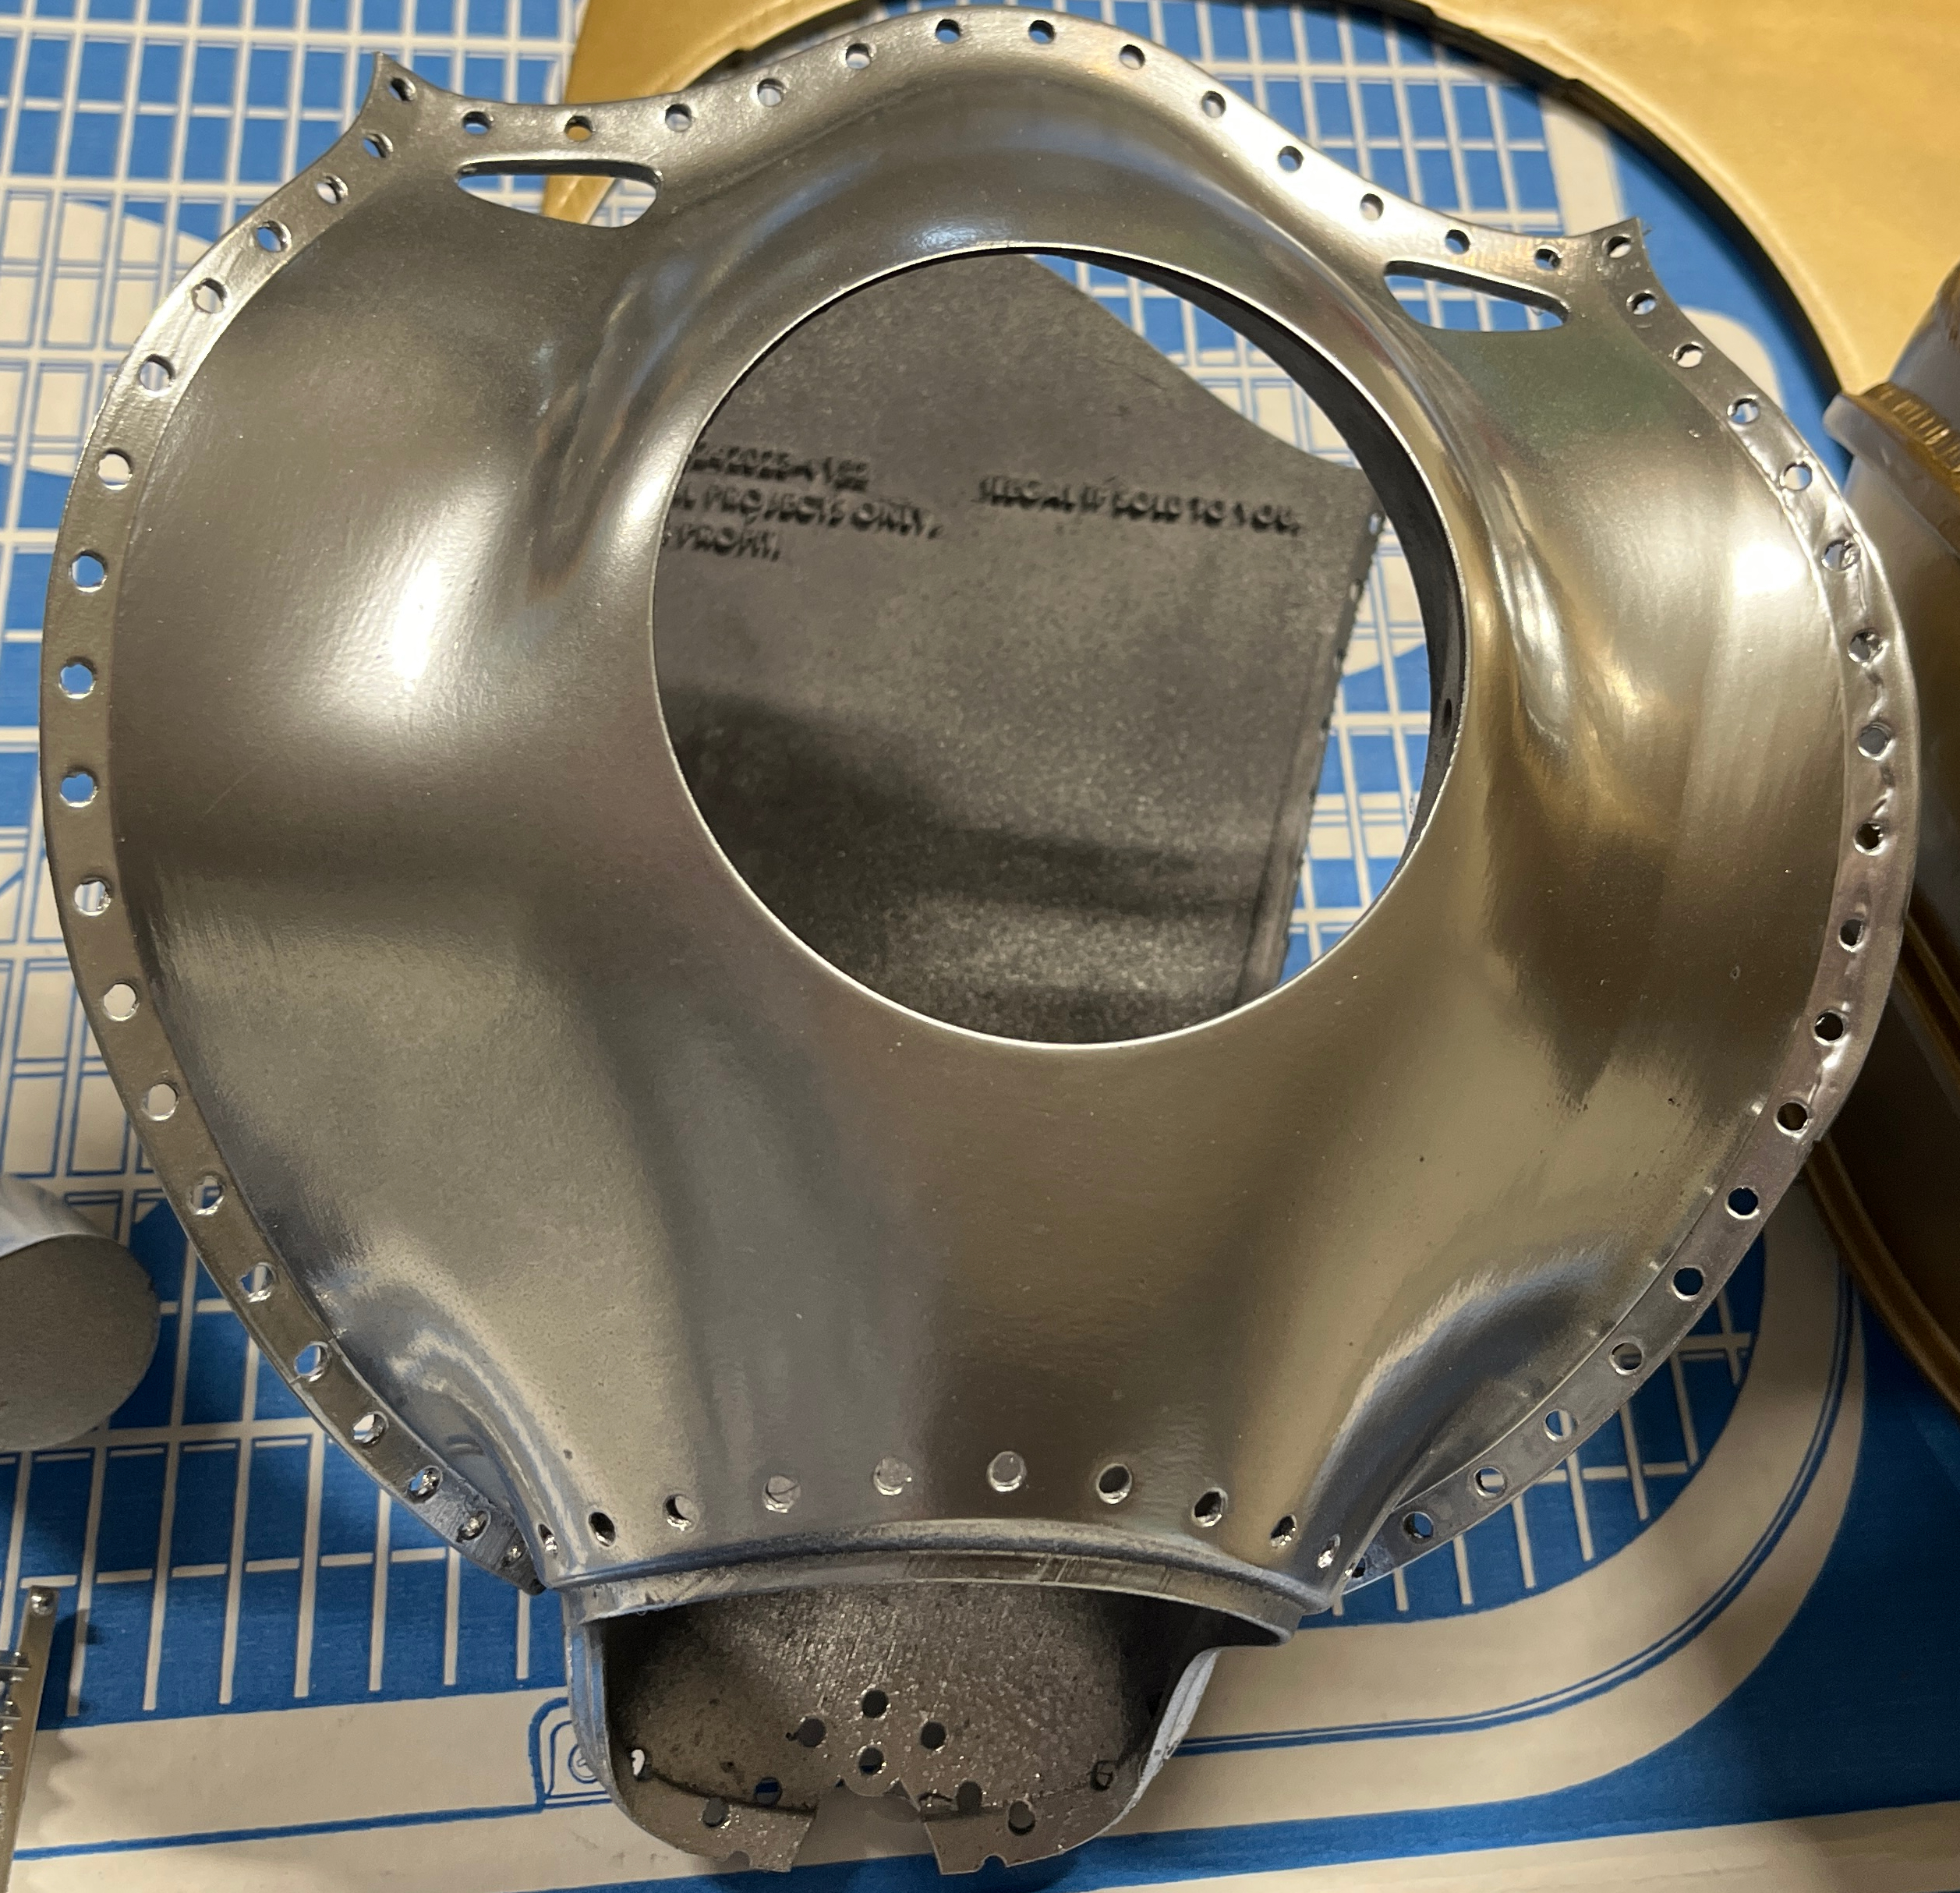
This was the first piece that I successfully got a good metallic finish on, and at this point I was stoked. I always intended to make something better than the first jetpack attempt, something that would make the first one look like a toy. But at this point it became clear that I could potentially make something indistinguishable from the on-screen props, and that inspired me to put in a lot of extra effort. I think this was also the point when I decided to add electronic effects to it.
The downside of that metallic finish was that it was _fragile_. Handling it rubbed paint off on my hands, and it dinged visibly and easily. I needed to protect things, so I grabbed a can of clear-coat spray protectant from the same brand of spray paint.
This was a mistake. Do not do this.
This was one of the first big lessons I learned here: I guess the clear-coat spray paint can be used successfully over regular colors, but using it on top of metallic paints just ruined the finish. I eventually found an explanation: the metallic spray paints are basically clear paints with tiny metallic-looking particles suspended in them, and when you spray it on something, the metallic particles stick to and coat the surface that you’re painting from inside that suspension, which is why it needs to be that smooth. But if you then spray the clear coat on it, it uses the same solvent as the metallic paint, so it just loosens up all of the metallic particles and lets them float around loose in the suspension, losing the smooth shiny surface. I saw some reports that you could successfully do this, but the steps were very fiddly and seemed to rely on a lot of luck.
Trying to find what people used as an alternative was tricky, because a) lots of people who are serious about this sort of thing are using airbrushes, which have different constraints, and b) the main product that people recommended no longer exists. The product in question was Future Polish, some brand of clear floor polish. It’s gone now, but I picked up a random brand of clear floor polish, squirted some onto a paper towel, and wiped the pieces down with it, and that seems to be working out well so far. It doesn’t look quite as good as it did with just the paint, but it’s a lot more durable.
So the main body of the jetpack was all done using chrome Rust-oleum spray paint. I tried their silver option, but that had a glittery finish that didn’t look right. The nose cones are a slightly different color in the movie, and based on a tip I saw online, I used Tamiya TAM85075 spray paint for those, and it seems like a perfect match. For the helmet and fan blades, I used Rust-oleum’s “metallic champagne bronze” and it seems fine.
If this was the kind of project I did with any regularity, I’m sure I’d pick up an airbrush and it would help. But I’m happy with the output of this process.