
First off, here’s the end result:
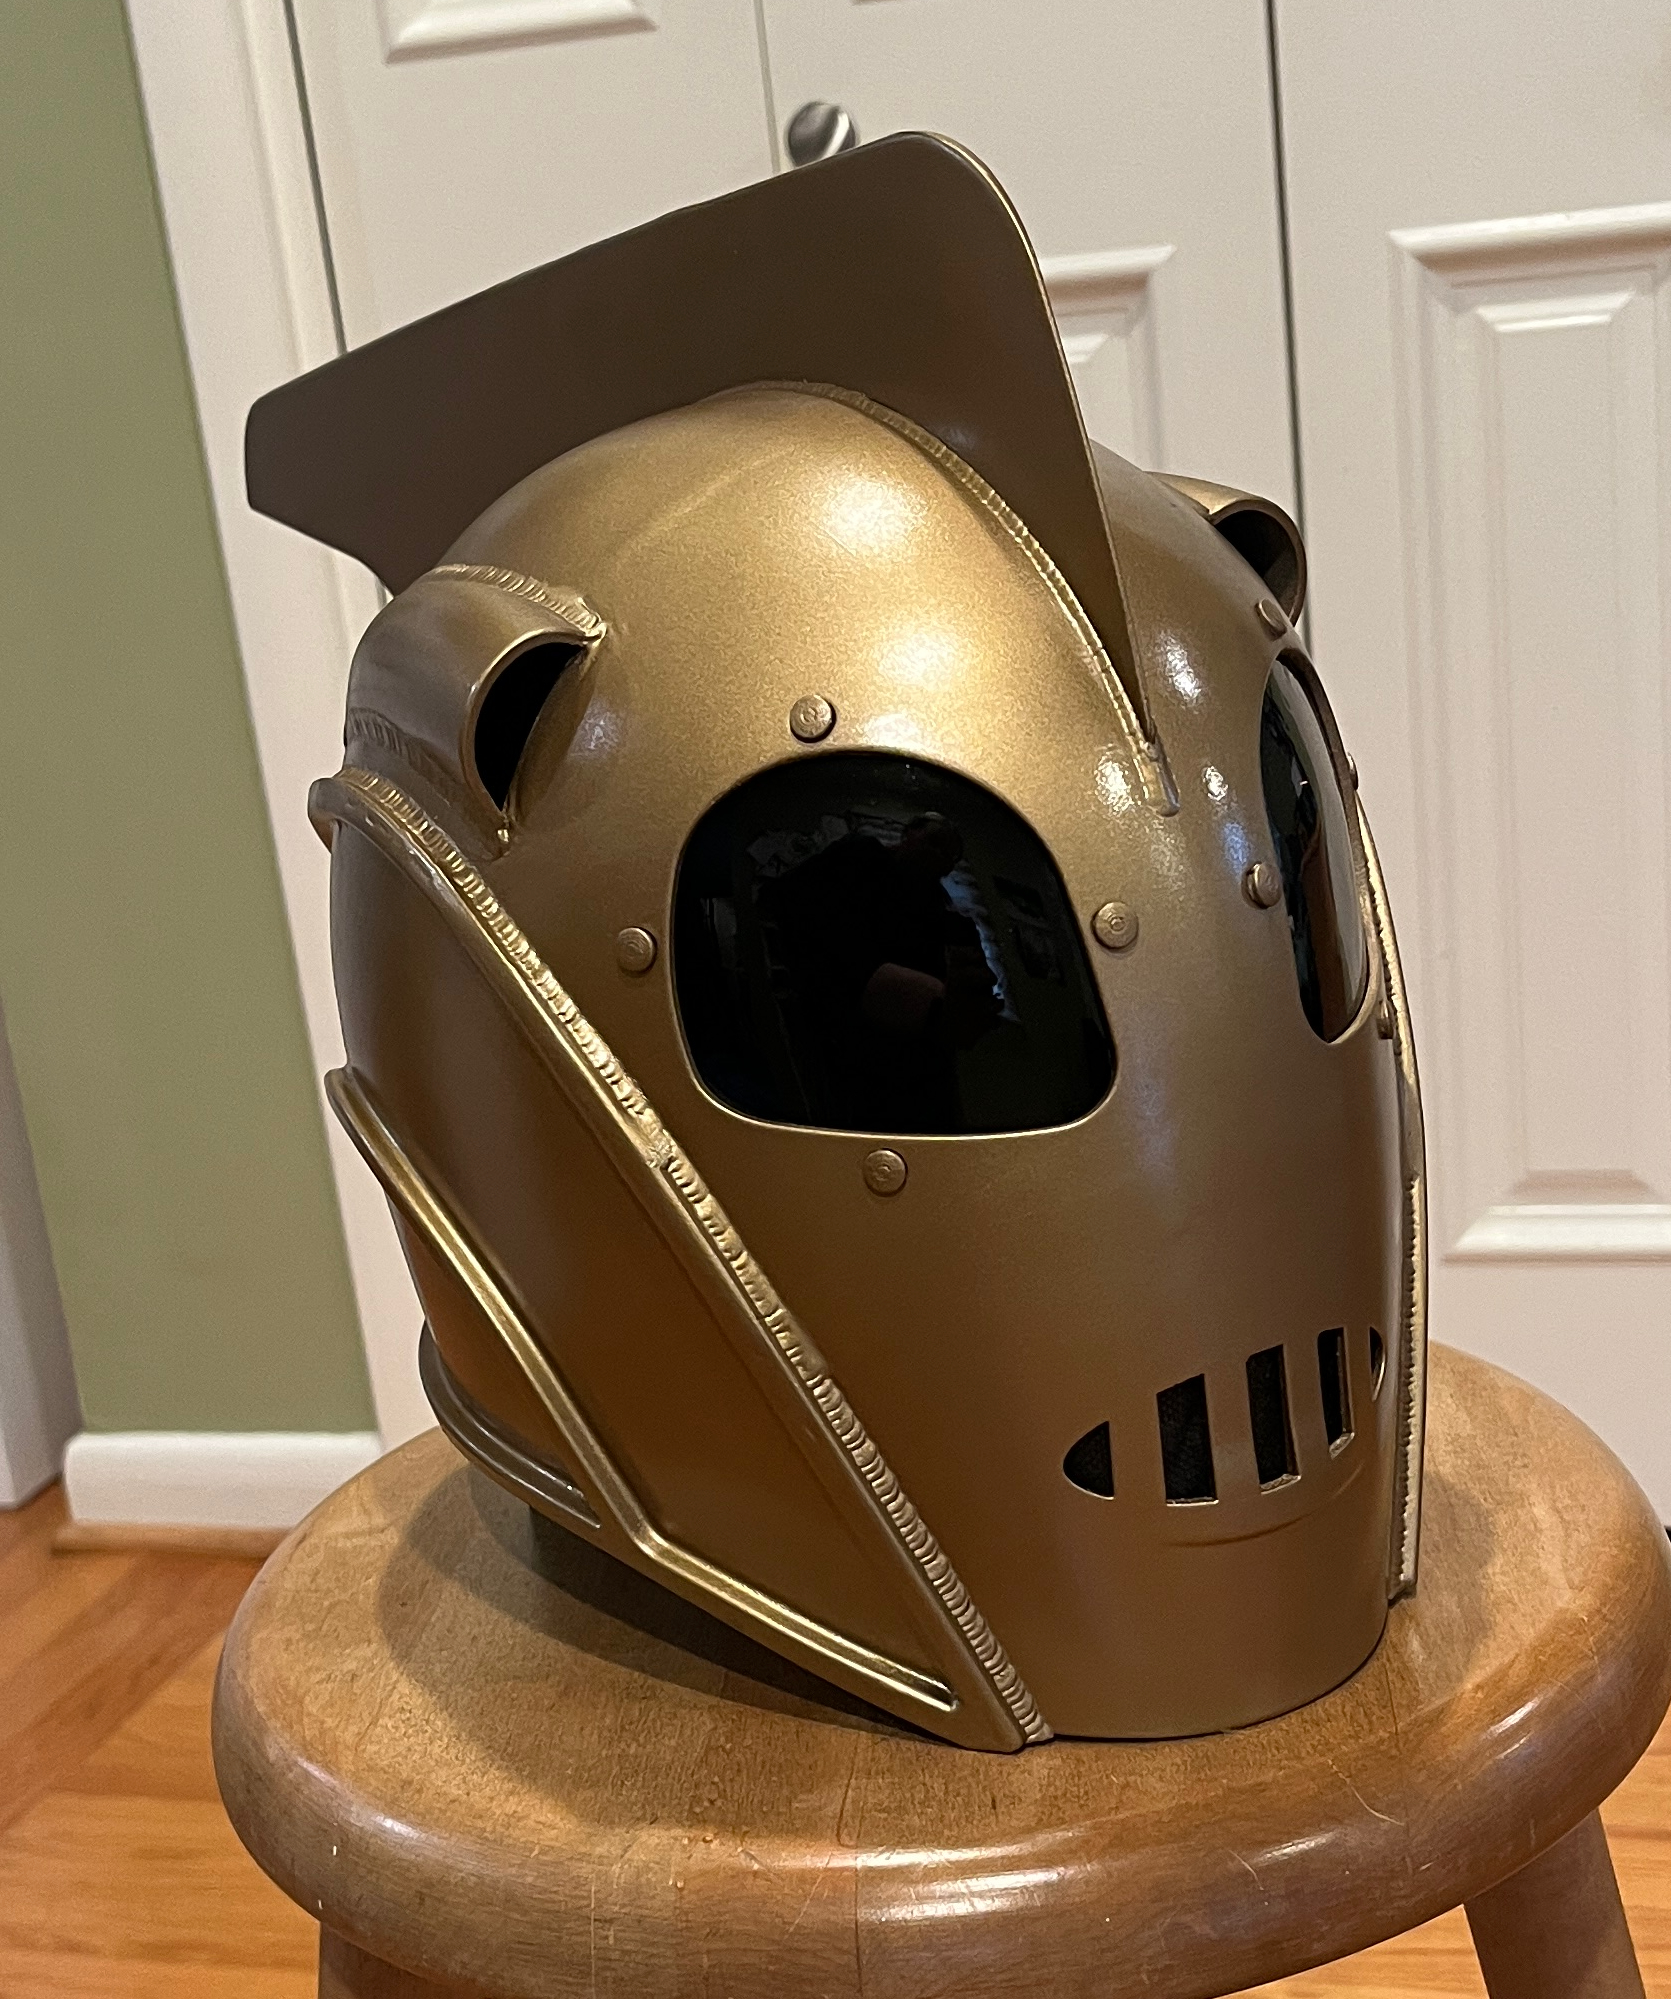
The 3D model I used for this was this design from Etsy. It was well-designed, and looked like a closer match to the on-screen prop compared to the other models I saw.
Like the jetpack, I printed it in plain white PETG on my Bambu Lab P1S, then followed the same steps for sanding and painting from my previous post. (side note: the weld lines are part of the 3D model itself.) Unlike the Veepy jetpack model, this one came segmented in ways that would result in visible seams. Or at least it would with my printer — it did include a model of the whole helmet at once, if that’ll fit on your print bed.
Here’s a comparison picture between the old and new helmets, which also shows the (taped-together) sections of the new one:
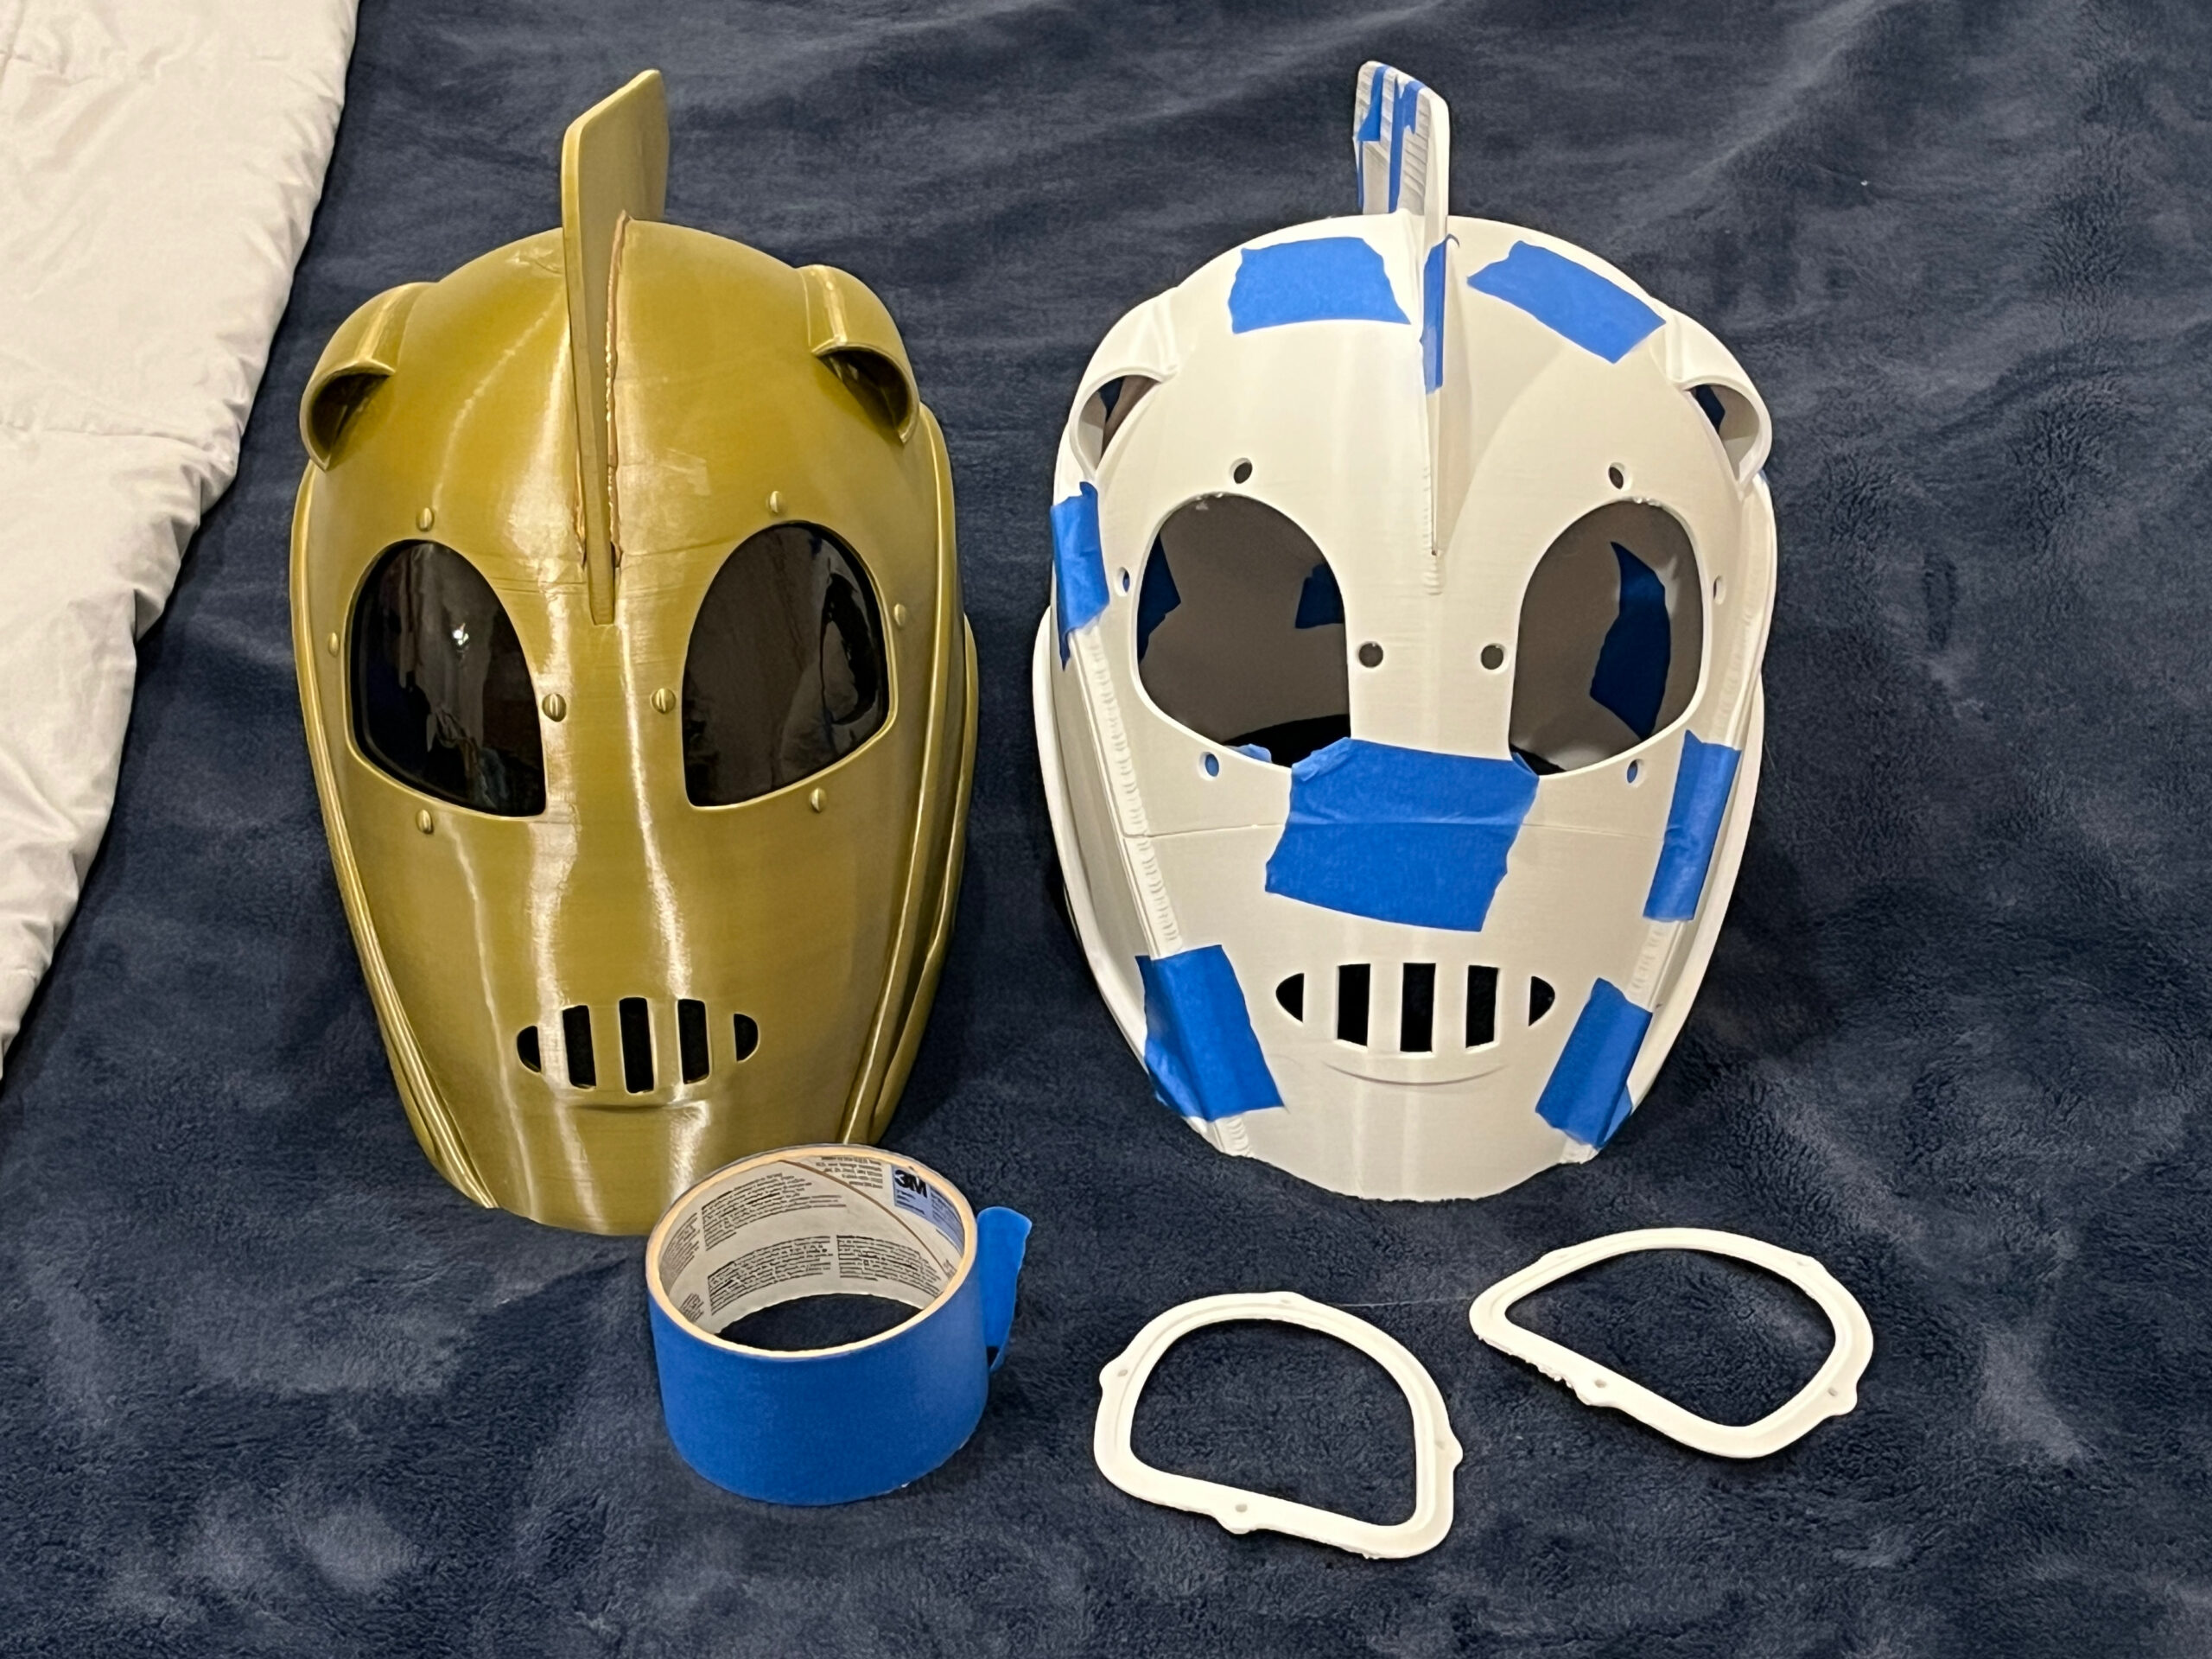
To deal with the seams, I originally figured I’d use some classic Bondo auto-body-repair stuff, but at one point when I was picking up supplies, I happened upon the much more appealing plastic resin goo that cures immediately under ultraviolet light. I was an instant fan of that stuff — take your time applying it, it won’t harden until you want it to, at which point you can cure it immediately and not wait to continue working on it. It’s nice and sandable after curing, too. I used that stuff to cover up the seam lines, as well as to smooth out the top surface lines on the jetpack flaps, and even to extend part of of the central section of the jetpack that didn’t quite print perfectly. Note that this stuff heats up a surprising amount when it’s curing, so you don’t want to be holding it when that happens.
This may have been a mistake, but I painted the top fin separately from the rest of the helmet, and then tried to glue it in place. Even after sanding the relevant spots, it was an incredibly tight fit. If I redid things, I’d try attaching it before painting.
The lenses were another tricky element. Those are tinted acrylic, thermoformed to the appropriate shape. The shape you’re using to press the hot acrylic sheet against is called the Buck. You wouldn’t want to 3D print the buck itself, because it would deform the printed plastic. The 3D model for the helmet included a model for an inverse mold of the buck, into which you can pour Plaster of Paris to make a solid buck that can survive oven temperatures.
Once the paster bucks were made for each eyepiece, I cut some pieces of 1/8″ thick tinted acrylic sheets to slightly larger than the shape I needed. I heated up an old toaster oven to 450-500F, and put in the buck with the acrylic piece on top of it, and waited a few minutes for the acrylic to visibly sag, indicating it was suitably bendy. It won’t droop enough to just flow over the buck like melted cheese — you need to force it into the shape. The best solution I found for that was to take a smooth silicone project mat and lay it over the piece, then press down hard on it with both hands. The silicone mat got warm, but not hot enough to burn me. Once the lenses were the right overall shape, I trimmed them down to the exact right shape with a dremel tool.
I wanted something to black out the mouth holes without restricting airflow, because otherwise I knew from my previous helmet that it would fog up the inside of the lenses pretty quickly. I had tried a few different solutions on the previous helmet, but eventually landed on the thing I used for this one as well: I took a black N95 mask from my COVID-days stash and cut out the outer black layer of it. It lets air through just fine, and doesn’t cause the lenses to fog up as much.
The inside of the helmet has a bunch of generic helmet padding stuck on it so it doesn’t rattle around on my head, and I made a quick fake leather chinstrap for it. I’ll be replacing the strap now that I’m starting on the leather work for the jetpack harness.
Oh, one last thing. For the first helmet, I was concerned about it being awkwardly sized, so I improvised a method of determining the proper amount to scale it in each direction such that it fit my head, but just barely. I took long LEGO plates and built a bit open rectangle and adjusted it in or out until I could just fit it over my head without issue. Then I measured that. Then I printed the single-piece version of the original helmet at about 30% scale, and measured the head opening with calipers, and scaled that up to 100%, and did the math to determine to appropriate scaling in each dimension. For the new helmet, I did the same thing, using the same LEGO frame as before. And once I printed the 30% version an scaled up its measurements, I found that its head opening was within a couple of centimeters of the target size. So no scaling needed. Fortuitous!